Product Name
Super Looper Line – patio light mounting system
Background
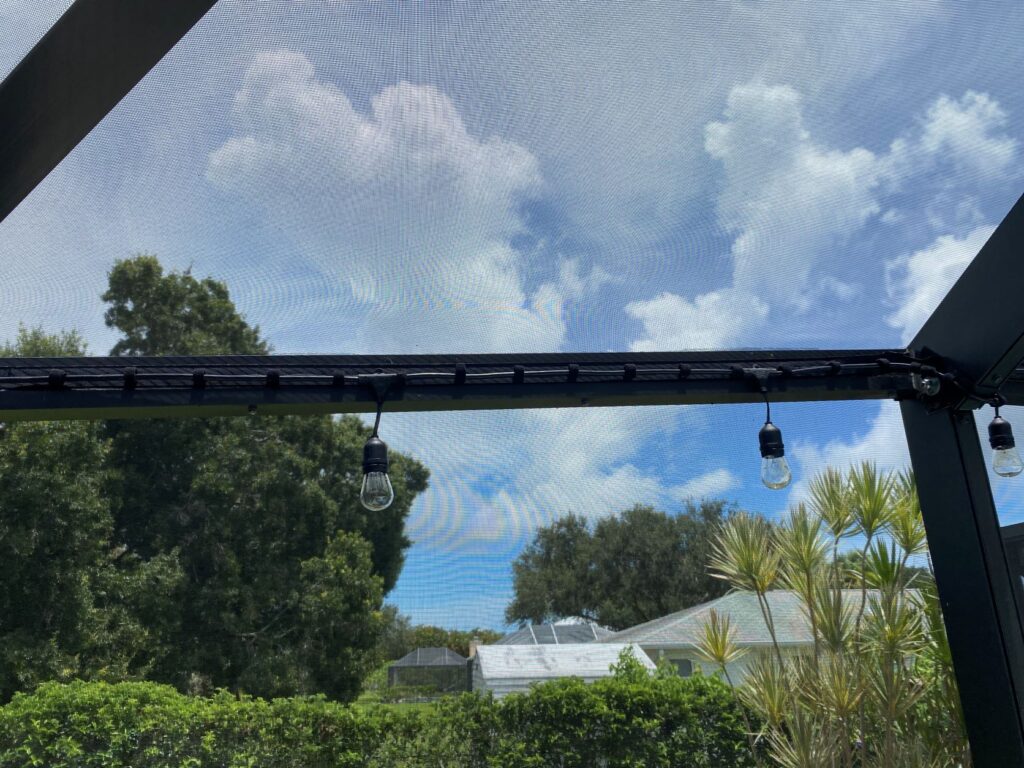
Recently I decided to add a lighting feature to the inside of my screened pool enclosure. I particularly wanted to have patio lights, the kind that look like old fashioned bulbs and display a pleasant, soft light. The light strands were purchased at a local hardware store and I brought home six strands to hang around the perimeter of the enclosure. The most likely attachment points were on the upward beams and cross members of the framing.
I did not want to damage the frame with any type of drilling. I also wanted a way to take down the lights easily. So, I went about looking for products that could hold the strands in that manner.
I was surprised at the weight of the lights and strands. They were much heavier than I had expected. That played a bigger role later in my project.
My first attempt to hang the lights was to use a popular plastic hook that rested on a removable strip of tape. I used one hook for each bulb in the strand and attached the strand light hook to the mounted plastic hook directly. The lights hung for about 4 hours before the tape and hooks started to fall. By the next day I realized that the weight, the heat and the breeze in our sub-tropical area was not conducive to this type of mounting product.
I decided to try a second, more substantial, cable mount clip. This product was advertised as one that would withstand a much broader temperature range as well as weight range. I again mounted the strands of lights and it looked like it might work. About two days later two of the light strands fell, crashing to the pool deck with a loud noise and explosion of glass shards. The first strand that fell played a role in pulling down the second strand which then started to pull the third, etc.
I took a week off of the project to clean the glass and had the pool vacuumed three times to ensure that no unwary bather would be injured.
The next attempt was to use heavy-duty hook and loop tape, rated at 10 lbs.
I purchased 1.5” wide hook and loop tape from the local home improvement store. The adhesive on the hook tape was very strong. I was encouraged. I depleted the store of the 1.5” wide hook tape and switched to 1” wide hook tape with the same strength rating. Again, I was anticipating a positive outcome because the adhesive on the strip that we applied to the inner edge of the metal frame was unbelievably strong.
The next step was to apply the loop strip to the hook strip and then to press the light strands and light junction points firmly to the adhesive on the loop strip. The lights held for the first 24 hours and I celebrated success, with cautious optimism.
Unfortunately, I was premature in my optimism and in the afternoon heat, again I heard the crash and splintering of lights.
Again, I took another week off for cleanup.
I decided that if I were ever going to try this again, I would not install the lightbulbs until I knew that the strands were secure. Frankly I had no idea of how I was were going to resolve this problem.
I am a software engineer by trade and I do have more than a passing interest in physics as well as construction. I knew that the10lb hook and loop tape was more than sufficient to hold the lights. The real problem was “How do you get the light strands to attach to the loop strip?”. Clearly the adhesive did not have enough surface area to get a grip on the cable and the junction points. Clearly the heat was a big problem.
I needed something that was not affected by the heat. I also needed something that would keep a hold on it if the wind blew.
I thought if I could just attach the light strand to the loop strip and then press the loop strip to the already mounted hook strip then we would be in good shape.
I bought a roll of non-adhesive loop strip, 1” wide.
I began to attach plastic cable ties (the kind used by electricians to bundle wires) through holes that I punched in the loop strip. The loop strip was so strong and tough that this method just was not worth the effort. I couldn’t punch holes fast enough and frankly the end result was very unattractive with all the little loose ends poking out. I was sure it would work but I was not happy with the result.
I had to find a different way to attach the lights to the loop strip.
Working with computers, I had used a variety of soft hook and loop cable ties for cable management. I realized that not only was this type of cable tie lightweight, but it was very strong. If you pull on hook and loop directly it is very difficult to pull the pieces apart. You have to roll it off by pulling the end away at a steep angle. I also knew that all I needed was a secure closure. The weight would be handled by the 1” loop against the 1” hook backing tape. The cable tie strips would distribute the weight across the entire length of the mounting strip.
So, I started sewing strips of ½” hook and loop cable ties to the 1” sew-on hook tape (no adhesive).
When I was done, I had 75 feet of 1” loop tape with ½” hook and loop cable ties sewn at approximately 3” intervals at 90 degrees to the loop tape.
I discarded the adhesive loop tape that I had tried unsuccessfully to which to attach the lights. I also removed the light bulbs from the light strands and began to hang the light strands.
Every three inches there was a ½” cable tie that I secured around the strand of lights. By the time I was done, which took less than an hour, I saw that it looked like the lights were going to hold.
And hold they did.
I put the bulbs in and they are still mounted securely since the day I tried my new design. The mounting has survived several very windy thunderstorms as well as 90+ degree heat.
Product Summary
This product allows the user to mount cables and string lights without drilling any holes that might weaken the structure to which they are being mounted. The materials used have a 10lb weight rating.
The mounting system is attractive and also allows the user to remove the light strands easily.
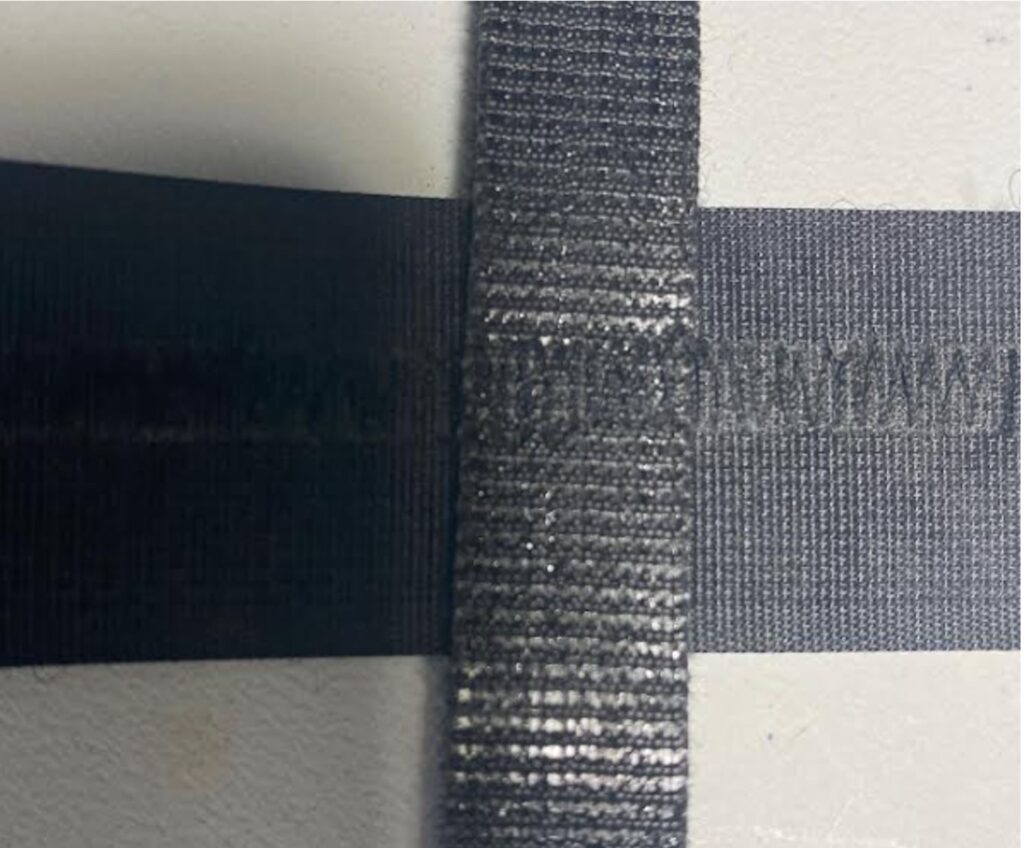
Figure: 4
Front View of Loop Tape Zig Zag Stitching
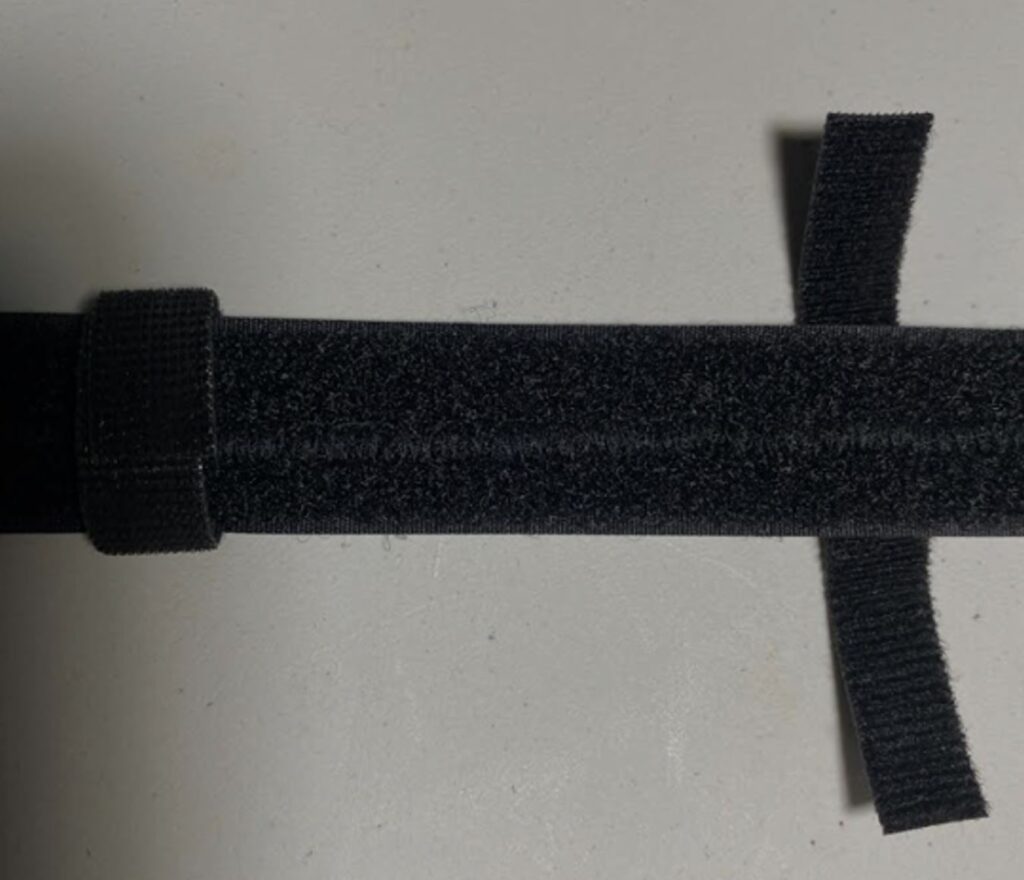
Figure: 5
Back View of Completed Loop Tape Assembly.
Folded cable strip on the left, unfolded cable strip on the right.
Note that the folded position of the cable strips here is for storage or packaging only.
When in use, the cable tie will be clasping the mounted object against the other side of the loop tape.
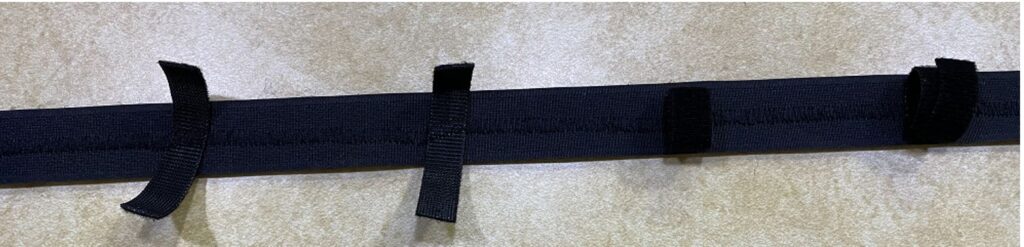
Figure: 6
Front View of Completed Sew-On Loop Tape with Cable Mounting Strips Attached at Intervals
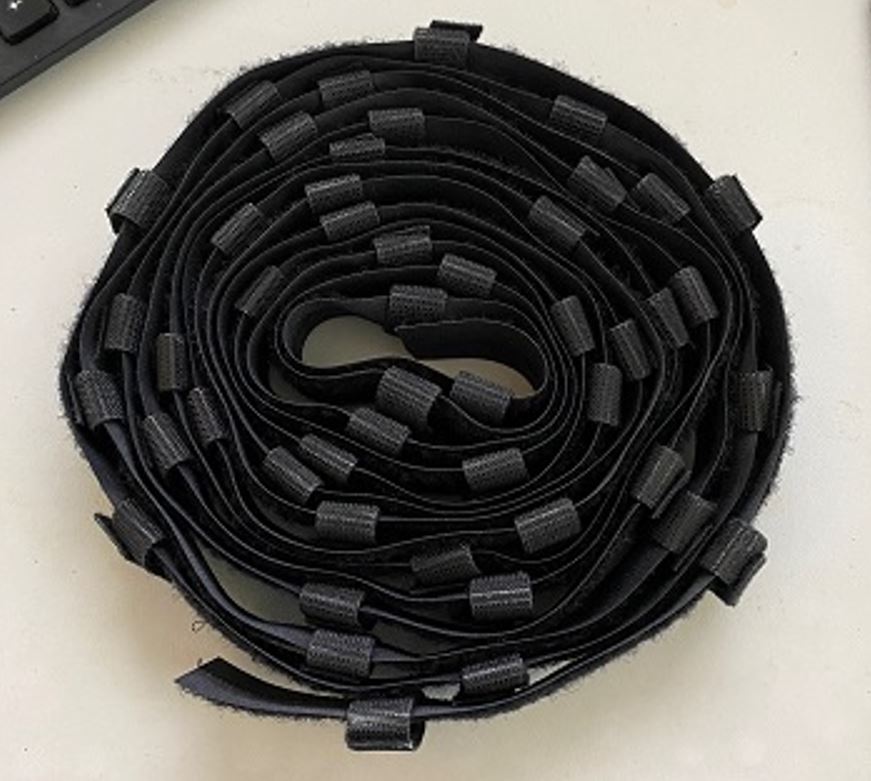
Figure: 7
Coiled completed product ready for packaging.
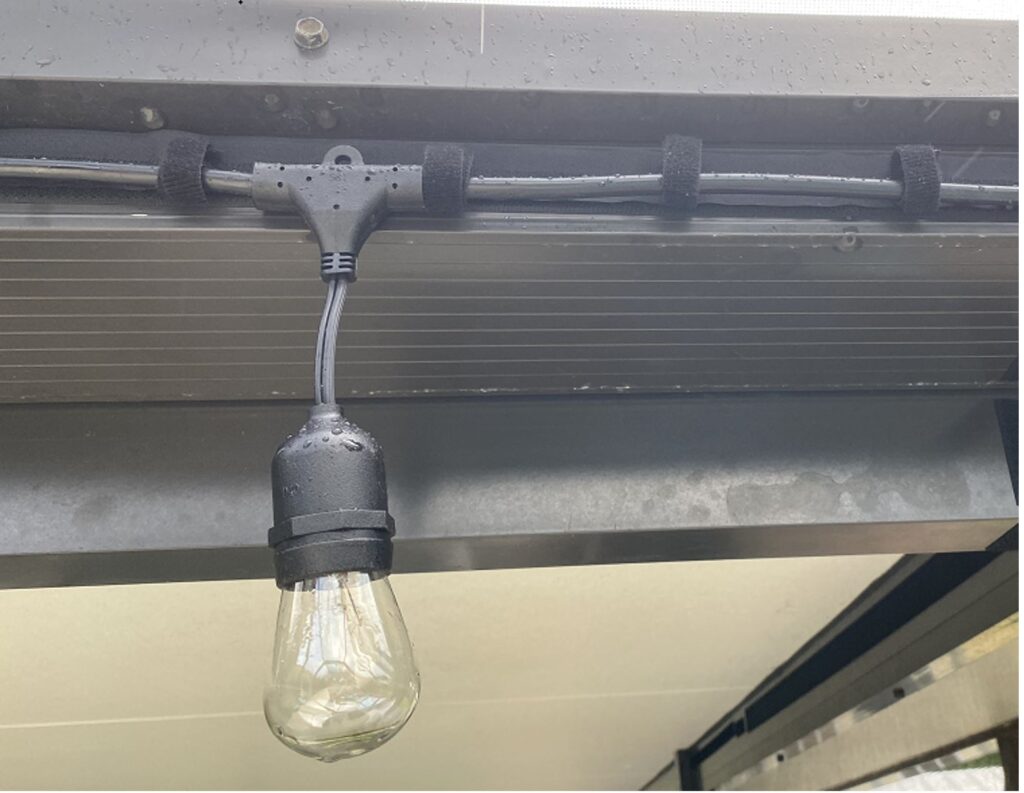
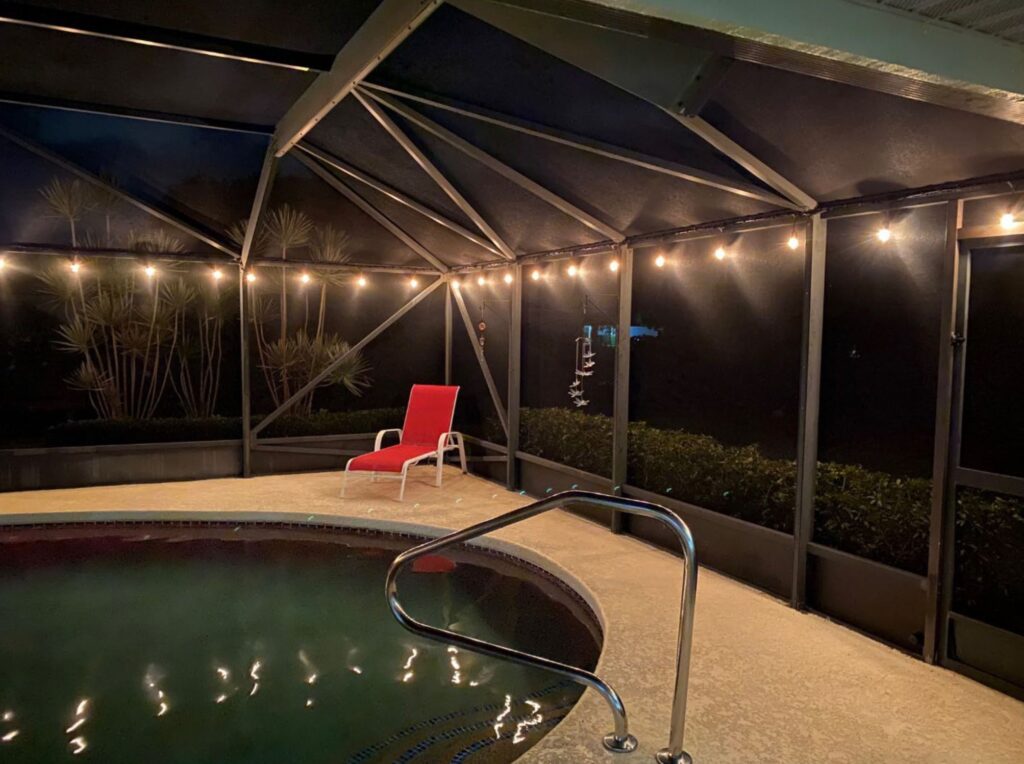
Figure: 8
Completed Installation – Suggested Use for String Patio Lights